My most recent projects include this rocker and dresser- after some hardcore tlc.


My friend Megan's Headboard Project:


My Cheap Re-Do Chair


Antique Linen Cabinet Updated


Simple Dinging Room Chair Updates


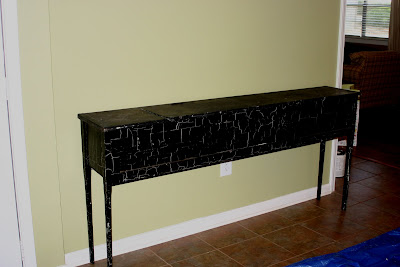
One of my latest projects- not completely sure what this used to be: I think it could very well have been a feed bin for animals? Well now it serves as a buffet in my Dining Room... and you'll see how I didn't let it's old use go to waste...

Inside before paint:


And since I thought this would be fitting since I think it was a feed bin... one of the compartments now hold's a 20lb bag of Moses' dog food.

A super simple stool...


Now here are some that I unfortunatley never got "before" pictures of... but you can at least see the techniques...


(can't take credit for this chair but able to do this technique as well)


Also just found this chair on the side of the road the other day- since it was free I thought I would at least see if I could do something with it.. so after I smelled it to make sure their weren't any odors, I loaded it up and brought it home- this is what it looked like before:

After thinking for a minute, I went and grabbed a duvet I had used a while back that was just collecting dust in the closet. I then just picked up a $4 pillow from walmart, added it to the sham that came with the duvet and Voila! Can't beat a new chair fr only $4!


Here are some decorative pillows and new dog bed I made for Moses out of some fabric I found at a fleamarket for super cheap!


I think he likes it...

Laundry Room Re-model for only $200
___________________________________________
When we moved in our house 7 months ago, there was one room left "undone". This room was the very plain Laundry Room. The floors were ugly concrete, there was an awful & huge flourescent ceiling light, not to mention the gigantic hot water heater completely obvious to anyone who walked in the tiny room. So I told my husband that we would have to figure something out- he said "ok, but we don't have much money, how much would it take"? After I thought about it, I told him I knew it needed a lot of work but I wouldn't spend more than $200. He seemed satisfied with that so I saved up here and there and we got busy! We actually started and finished in less than two days!
I knew I wanted lots of storage, a desk, a place for a future sewing machine (which I just got 2 months ago), and a workspace to fold clothes or work on crafts. That's a lot to accomplish for my small budget but we did it!
So enough rambling... here are the pics:
Before:


After some great Flea- Market finds, a trip to Fred's for some peel -n- stick tile flooring, and a Lowes visit, and a little shopping around my own house, this is how it turned out!
After:


i love it! love the site, love the befores and afters and love the general idea behind it all. way to go! (btw- we'd love to see you guys when you come to town next month!)
ReplyDelete